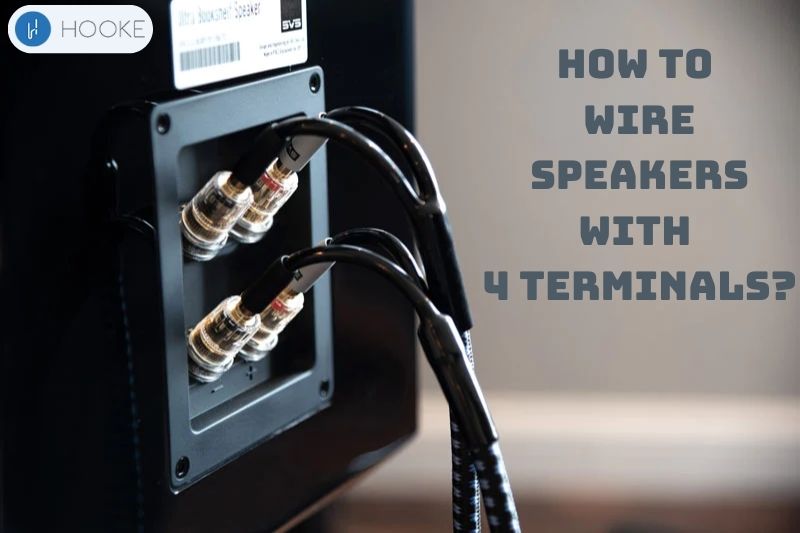
Setting up a high-quality speaker system can take your music listening to the next level if you are a fan or music lover.
But it can be hard to figure out how to wire speaker wire with 4 lines, especially if you haven’t done it before. Don’t worry, because we’ll show you how to wire your speakers right and make sure you get the best sound possible.
In this article, Hookeaudio will explore the basics of wiring speakers with 4 terminals, what tools you’ll need, and some tips to make sure you do it right. Just keep in mind that these are speakers with wires on the ends.
So, if you’re ready to learn How To Wire Speakers With 4 Terminals, let’s get started!
Contents
Can you Wire Speakers With 4 Terminals?
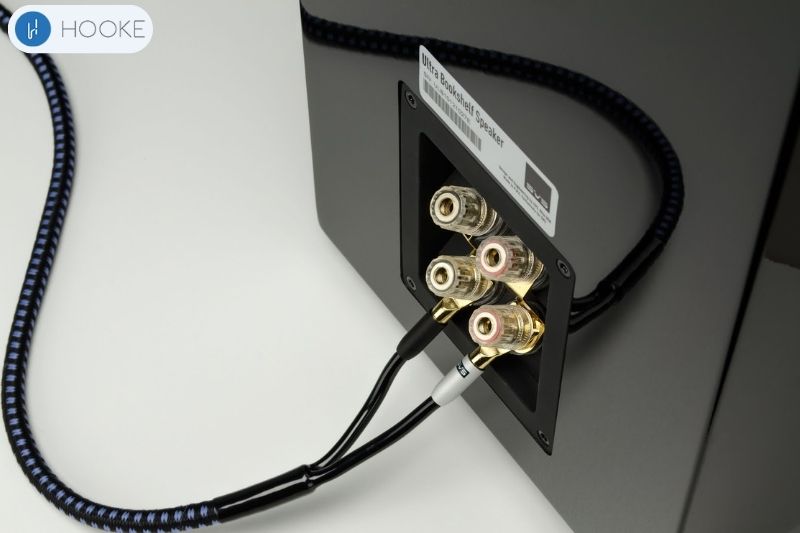
Yes, speakers with 4 terminals can be wired. These speaker terminal connector types are known as bi-wire or bi-amp speakers, and they allow for separate connections to the woofer and tweeter sections of the speaker.
A bi-wire speaker requires four wires, two for each part. The tweeter terminals are usually on top, while the woofer terminals are on the bottom.
To wire the speaker, connect the amplifier’s positive terminal to the speaker’s top and bottom positive terminals. Repeat the same process for the negative terminals.
If you only have a standard two-conductor speaker wire, you can still connect it to a bi-wire speaker. Just connect the positive terminal on the amplifier to the positive terminal on the top of the speaker. Then, use a short piece of wire to jump the connection from the top terminals to the bottom terminals. Repeat the same process for the negative port.
Keep reading the content below to deeply know speaker wire terminals.
How To Wire Speakers With 4 Terminals
Bi-Amp
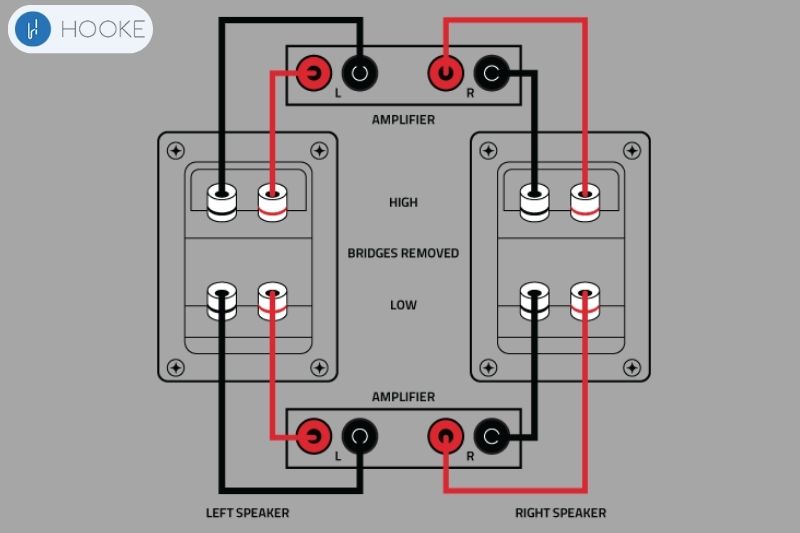
Bi-amping speakers with 4-wire speaker connections require two amplifiers to power each frequency range.
A speaker with four terminals has two for the low-frequency driver (woofer) and two for the high-frequency driver (tweeter).
Due to each amplifier’s frequency range, bi-amping improves amplification control and efficiency. This can improve sound quality, especially in bigger speaker systems.
Make sure to check the manufacturer’s requirements before bi-amping a speaker because not all are designed for it.
You must attach the positive and negative terminals of each standard speaker to its own amplifier in order to bi-amplify them.
In other words, one amplifier’s + and – terminals will be connected the positive with negative ports of one speaker. The positive and negative terminals of the other speaker will be linked to the + and – terminals of the other amplifier.
How to Attach Speaker Wires via Bi-Amping:
- Choose which amplifier will be used for high and low frequencies, respectively.
- Join the positive speaker terminals to the positive terminal of the low-frequency amplifier channel.
- Connect the speaker’s negative terminal to the negative terminal of the low frequency amplifier.
- Join the positive terminal of the speaker to the similar terminal of the amplifier for high frequencies.
- Attach the speaker’s negative terminal to the negative terminal of the amplifier channel for the large frequencies.
- Switch on both amplifiers and check out the sound quality.
- Recite steps 2 through 6 for the second speaker.
By doing these easy steps, you can bi-amp your speakers and benefit from a superior overall sound. Now that you are aware of the bi-amp system.
Bi-Wiring
Bi-wiring can wire two-way loudspeakers with independent woofers and tweeters. The tweeter captures high frequencies and the woofer the remainder.
You can utilize the crossover network of each driver by using two independent speaker connections, one for each driver.
Detailed Instructions for Bi-Wiring Speakers
- Cut the wire at the appropriate speaker section’s back.
- Remove the insulation from each wire’s end.
- Twist the wire strands together to create sturdy bi-wire bridges.
- Carry out steps 1-3 on the opposite wire.
- Attach each wire’s open end to a terminal on the corresponding speaker component.
- Attach each speaker wire’s other end to the appropriate terminal on the opposing speaker.
- Reattach the cable to the speaker’s rear.
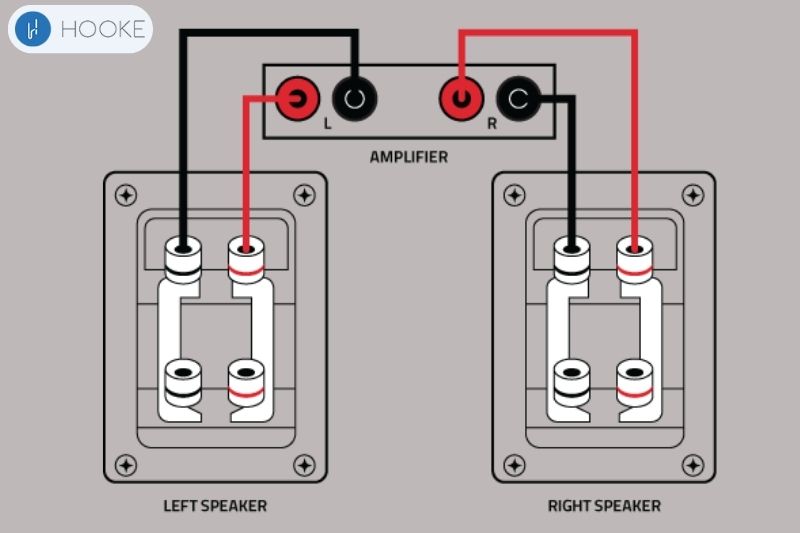
Leaving the conductive bar between the terminals and connecting one set of wires
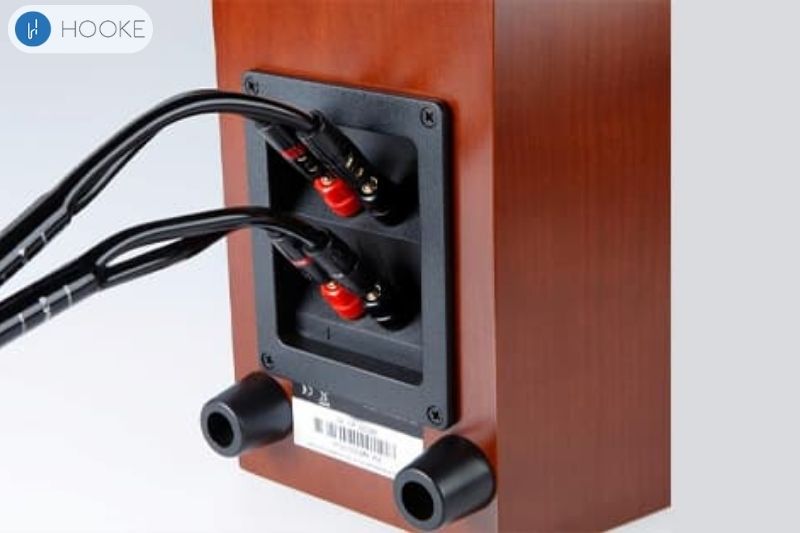
Here’s a step-by-step guide on how to connect wire speakers with 4 terminals:
- Ensure the entire speaker system is powered OFF.
- Locate the bi-wire bridges or jumpers that connect the two sets of binding posts on the speaker.
- Remove the bi-wire bridges or jumpers that connect the 2 sets of binding posts on the speaker.
- Connect one set of speaker wires from the amplifier to the binding posts on the speaker. The positive (+) and negative (-) wires should be connected to the speaker’s positive and negative terminals, respectively.
- Repeat step 4 for the other channel of the amplifier and the other speaker.
- Power on the amplifier and the speaker system.
- Adjust the gain and frequency response of each amplifier to optimize the sound quality of the speaker.
Leave the conductor bar between the terminals and connect one pair of wires to single-wire the speakers.
The conductive bar ensures that the signal is sent to both the woofer and tweeter sections of the speaker.
This method works in most cases, although not all 4-terminal speakers can be bi-wired. To wire a speaker, consult the instructions or manufacturer.
The sound quality of the speaker can also be improved by using excellent speaker cords.
What Speakers Connection Types of Connections Do Speakers Have?

There are 2 speaker connectors types:
Binding Post Connections
Binding posts are the most common type of connection found on speakers. On the back of the speaker, there are small metal connectors that let you connect the speaker line.
Binding posts come in two varieties: banana plugs and bare wire connections. Banana plugs are a type of connector that slides into the binding post and tighten with a screw.
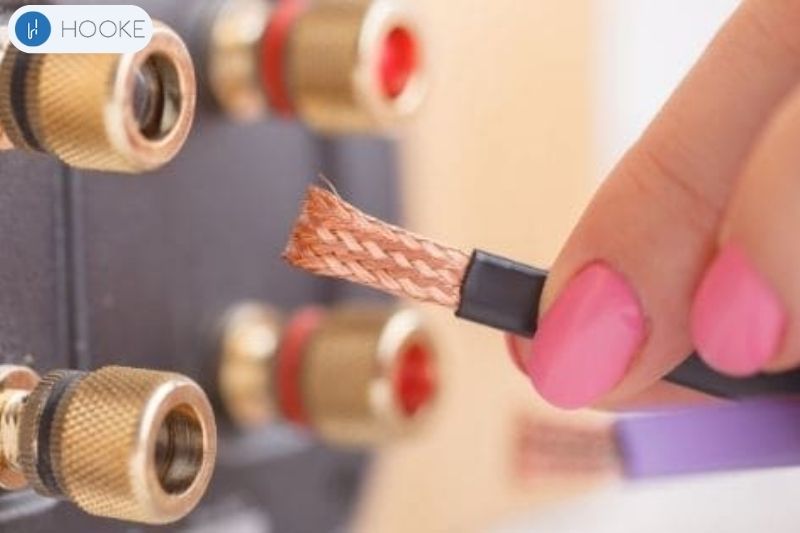
Bare wire connections require you to insert the bare end of the speaker wire into the hole in the binding post and tighten the screw to hold it in place.
Spring Clip Connections
Spring clip connections are another type of speaker connection. They consist of a small metal clip that you push down to insert the speaker wire into the hole.
When you release the clip, it clamps down on the wire to hold it in place. Spring clips are not as secure as binding posts, and they can be more difficult to work with. However, they are less stable and harder to use than binding posts.
Are Those Connection Types Better Than Speaker Wire?
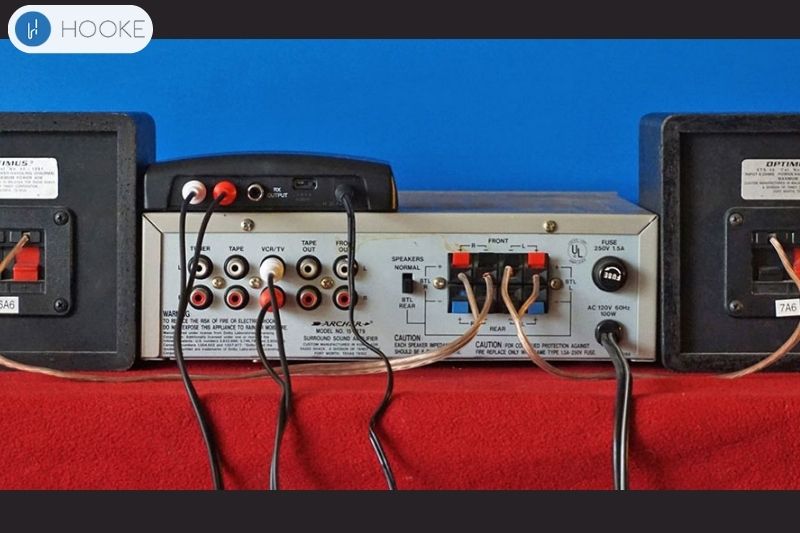
Binding posts and spring clip connections can attach speaker wires to speakers quickly and easily.
Speakers sound best when wired with good wire. The wire’s resistance and capacitance depend on its gauge (thickness) and materials, which might affect speaker performance.
Binding posts and spring clips are easier than splicing and soldering speaker wire, but they may not be better.
Speakers, amplifiers, sources, cables, and room acoustics all affect your sound system’s quality.
FAQs
Do Positive and Negative on Speaker Wires Matter?
Yes, positive and negative on speaker wires matter. Speakers work by moving air back and forth to create sound waves. When the polarity of the speaker cables is switched, the speaker cones move in the opposite way. This cancels out and messes up the sound waves.
How Do I Know Which Speaker Wire Is Positive And Negative?
Red indicates positive (+) and black indicates negative (-) speaker wires. If the wires are not color-coded, a simple test can be done by connecting the wires to a 1.5V battery. Then observing which wire causes the speaker cone to move outward (positive) or inward (negative).
Once identified, the wires should be marked or labeled to ensure proper connection in the future.
Can You Split Speaker Wire?
Yes, you can split speaker wire to connect multiple speakers to a single output. To avoid damaging the amplifier or receiver, the speakers’ overall impedance must not go below the minimum suggested.
Speaker selectors and distribution amplifiers help match impedance.
How To Split Speaker Wire?
To split the speaker wire, first cut the wire to the desired length and strip the ends to expose the copper strands. Next, twist the exposed strands and insert them into the speaker switch or distribution block terminals.
Use wire nuts or crimp connectors to connect extra wires to the primary wire. Avoid harming your audio equipment by following correct wiring techniques and checking impedance.
How To Hook Up 4 Conductor Speaker Wire to Receiver?
To hook up a 4-conductor speaker wire to a receiver, first, remove about 1/2 inch of insulation from the ends of the wire.
Then, match the positive and negative wires and insert the exposed wires into the receiver’s speaker output terminals. Finally, tighten the terminal screws to secure the wires in place.
How to Wire AMP to Speakers?
- First, make sure that the amp and the speakers are compatible with each other in terms of impedance (measured in ohms). Check the specifications of both the amp and the speakers to ensure that they match.
- Turn off both the amp and any other audio equipment connected to it, and unplug them from the power source.
- Match the positive and negative speaker wires to the amp’s back terminals. Positive connections are represented with (+) and negative connections with (-).
- Again, match the positive and negative connections when connecting the speaker wires to the back terminals.
- Double-check all connections to ensure that they are secure and that no wires are touching each other or any metal surfaces.
- Plug in the power cords for the amp and any other sound equipment, and turn them on. Gradually increase the volume to test the sound quality and make any necessary adjustments.
Read more:
- Can You Bring Speakers On A Plane? Everything You Need To Know In 2023
- How To Connect Two JBL Speakers?
- What Size Speakers Are In My Car?
- Best Computer Soundbar
Conclusion
With the correct equipment and advice, wiring 4 wire speaker to 2 wire can be easy.
Use the right gauge wire, connect the negative and positive wires properly, and avoid shortcuts that could damage your sound system.
You may enjoy great sound from your favorite music, movies, and games by following these rules.

