- Anthony
Do you already know How to fix headphone wire? Continue reading this article; Hooke Audio suggests a repair headphones wire method that you should refer to.
If your headphones are starting to show signs of wear and tear, it may be time to fix the headphone wire. Although it may seem daunting, with a little patience and some care instructions, it is possible to fix headphone wire yourself. With a few simple tools, you can have your headphones working like new in no time.
Contents
Possible Issues With Software Or Devices

Sometimes the problem could be due to an error in the audio settings of your smartphone or computer, a software glitch, or other issues. In these cases, it may not be necessary to replace the headphones.
It is important to rule out other possibilities and ensure that the problem is with headphones only. This is how to check for that possibility.
Restart your device
Restarting your phone or computer is a quick and easy way to solve headphones that stop working after updating software or an audio app. This simple action can often resolve the problem. If the problem persists, you can move on to the next steps.
Try another pair of headphones
Connect to the audio source (PC or smartphone) that you use frequently and test if you can hear both audio channels. If both audio channels can be heard on one headphone, your headphones may be at fault.
If that happens, skip the next two sections and go to the section that discusses the solutions for wireless and wired headphones. Continue reading if you don’t mind.
Are Exposed Headphone Wires Dangerous?
No, exposed headphone cables are not inherently unsafe.
Although electricity does travel through headphones or earphone wire, it does so at a very low voltage determined by the headphones’ impedance. So, even if you unintentionally touch an exposed wire, you can be certain that the frayed wiring in your headphones will not electrocute you.
Exposed headphone cables are more prone to short-circuit and harm the headphones. Short circuits occur when an excessive charge flows to an unwanted wire and are often caused by damaged or exposed wire insulation. This may result in overheating and electrical sparks, damaging both your headphones and your audio source.
Keep in mind that electric sparks, regardless of voltage, have the potential to cause fires. Even static discharges are enough to ignite combustible gases in the air.
How To Fix Headphones Cord?
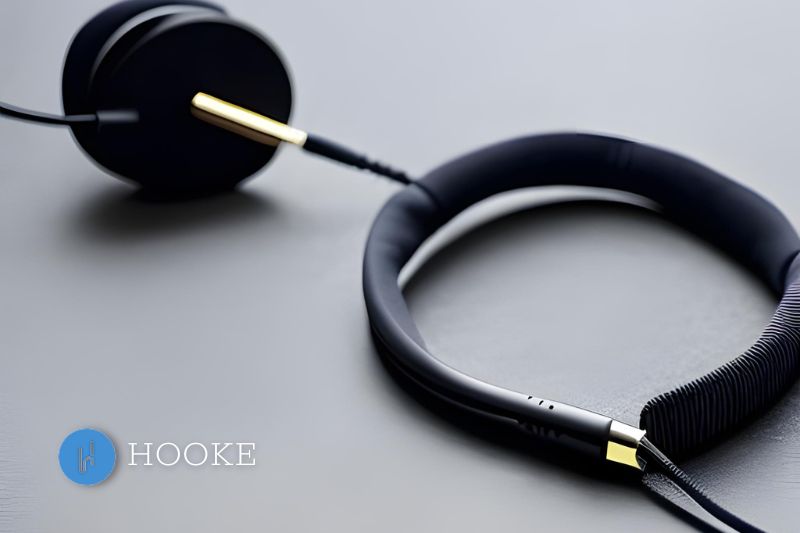
Your earbud or headphone wire will not play audio if it is damaged or cut on one end. This is usually caused by tangles or improper wrapping of the headphone’s cords.
Read More: How To Untangle Headphone Cords? Top Full Guide 2023
1. Use heat-shrink tubing
You can also use heat-shrink sleeves or tubings to make your fix more durable and lasting. These tubings can be used to repair, reinforce, or insulate frayed electrical wires. These are the steps:
Make sure you check the material
It made of plastic materials like polyolefin or FEP are made from these materials.
Polyolefin is recommended for headphone wires. They are durable and highly resistant to extreme temperatures, from -55 to 135 degrees C.
Select the right size
To ensure a secure and snug fit, choose a heat shrink tubing that is the same size as your headphones’ cables.
These tubings shrink from one-half to one-sixth their original diameter depending on the material and composition. There are three popular shrink ratios: 2:1, 3:1, and 4:1.
This is the ratio between the original tubing’s size and its shrink size. The recommended shrink ratio for headphone wires is 2:1.
This site provides the best balance between durability, flexibility, and strength.
Make sure to clean the area where you are wrapping
Clear the area to be wrapped of all debris and grease. Use a damp cloth to apply a little isopropyl alcohol. Let it dry.
The tubing should be inserted into the headphones’ wires
Insert the tubings carefully into the headphones’ frayed wires. Wrap-around heat shrink tubings should be wrapped tightly to ensure a compact finish.
Heat the area
The heat-shrink tube kit comes with a heating device. You can heat the area using a heat gun or a lighter.
It is essential not to overheat the tubing as it could melt or catch fire. Hot air guns/lighters can cause burns, so make sure you use a plier to keep the tubing in place.
2. Wrap it in electrical tape
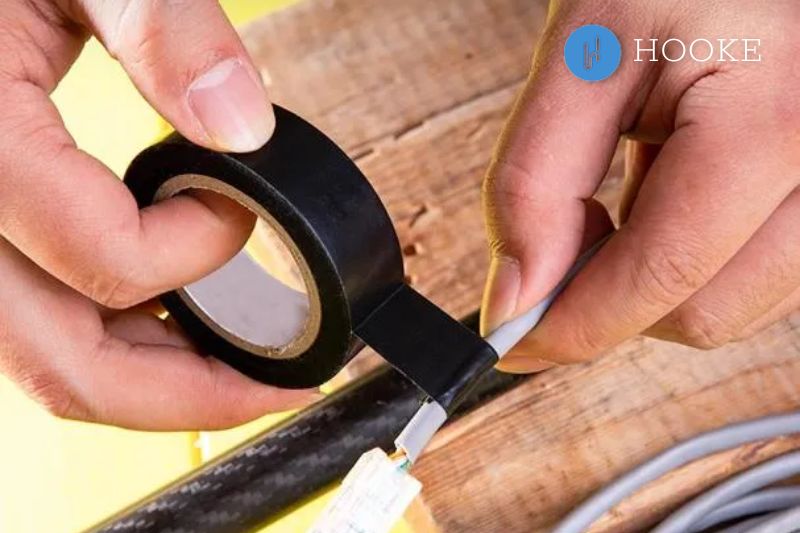
Most likely, you have electrical tape at home. It can be used to repair your headphone wires quickly and easily. These steps are foolproof:
Prep your wire
Make sure your wires are clean. This will make your electrical tape stick better to the wire. This can be done by using a clean cloth and applying a little isopropyl alcohol to it. Let it dry.
Pre-cut
The sizes of electrical tapes can vary. Before wrapping the wire, make sure you have it cut to the correct size.
Wrap it
Then wrap around it as tightly as you can. The video will protect the wire and insulate it. This youtube tutorial will give you a better understanding of the process.
Read More: How To Fix Headphone Wires With Tape? Top Full Guide 2023
3. Mould Sugru
Sugru Mouldable glue is a silicone rubber-based all-purpose moldable adhesive putty. This glue can be used for DIY projects, mounting, repairs, and many other purposes. It’s moldable, flexible, and waterproof. Here are some ways you can use it for frayed headphones wires.
Clean the wire
To remove any oil, dust, or debris from the wire, clean the area with Isopropyl alcohol. Use a clean cloth to apply a little isopropyl alcohol. Let it dry.
It can be mold
Sugru Mouldable glues are malleable and soft, similar to play-dough. Use your fingers to roll the material around the wire with your hands. It will take approximately 30 minutes to shape the material and position it in the desired way before glue sets.
It should be left for at least 24 hours
To allow the material to set permanently, leave it at room temperature for a minimum of 24 hours
4. Use Cable Savers
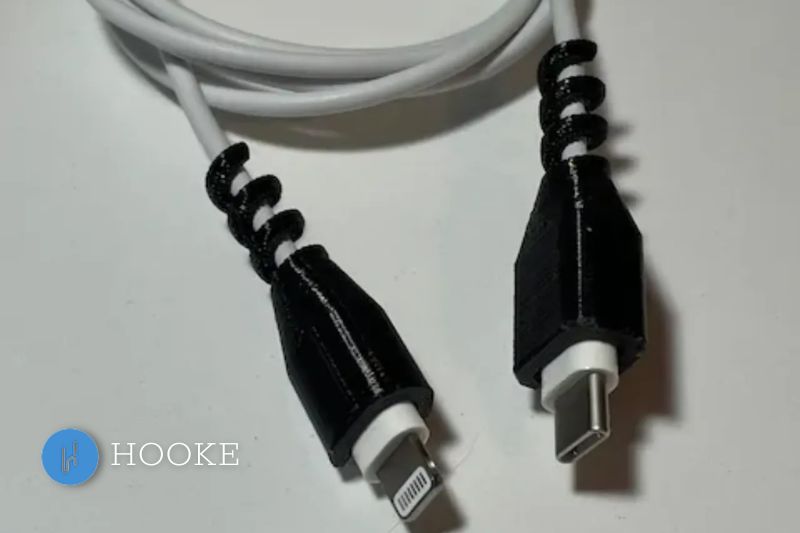
These Jetec cable savers are great for those who don’t like to do a lot of DIY and want an easy solution. These are used to protect wires from fraying. You can use them on exposed wires for added support and backing to your headphone cables. These are the three steps to use them:
Select the correct size cable saver
There are many sizes available for these cable savers. You should choose the one that will fit your headphones the best.
Wrap
Wrap the cable protector around the area where the headphones’ wire is fraying.
Adjust
To ensure that the cable saver stays in place, wrap it up to the end of the wire. This is the part where the headphone cord repair meets with the plug. These Jetec cable protectors are only for round cable wires.
5. You Can Try Replacing Headphone Cable
You may need to replace your headphones if the above-mentioned repairs are not able to fix them. If you are thinking about buying expensive headphones, we recommend that you read our detailed guide to Replacement headphone cables reviews.
More Severely Broken Headphones
Suppose the wires have been severely damaged. There is hope for those wires that are severely damaged.
You can either solder the headphone wires or use a different method. It may be better to replace the headphone socket if the headphone plug causes damage. This is the most cost-effective and secure way to go. Before you do any of these things, make sure your headphones are still covered under warranty.
Attention:
- If you’re willing to give it a try, make sure to follow these steps.
- Make sure you do it in a well-lit area and wear safety gear.
1. Repairs with soldering
You will need:
Soldering kit
- Wire stripper/knife/cutter
- Heat-shrink tubing / electrical tape
- Lighter (or sandpaper)
Start to strip the wire
To expose the wires, remove the insulation. You can separate two wires that twist them together by using a knife or a cutter. You can remove the outer shielding using a wire stripper. Make minor cuts (1/4 to 1/2). Keep cutting until you find a damaged wire that requires repair. You may discover different-colored wires in the inner layer of your headphone cable. The headphones wire colors
(red, green, or blue) transmit sound. The ground wire, which is the uninsulated and bare wires, transmits sound.
The wire should be cut
Cut the headphone wire if the wires are frayed, and the threads are visible. This will make them more uniform and easier for you to work with.
To expose copper, sand the wires
Sand off the enamel coating on all wires, including the ground wire, before soldering. Sand until the copper is exposed. If you don’t have any sandpaper, you can burn the copper off with a lighter or soldering iron.
Connect the wires and solder
Connect the wires by twisting them together. You can melt a thin layer of solder on the wires with your soldering iron. Allow the solder to set entirely before cooling. Wearing proper Personal Protective Equipment (PPE) is a must before you start soldering. This will protect you from harmful chemicals and prevent you from inhaling dangerous soldering fumes.
Use electrical tape to wrap each wire
Wrap each wire carefully with electrical tape after the internal wires are completely cooled. This will prevent them from touching one another and help to avoid short-circuits.
Heat the heat-shrink tubing and place it on top of the cord
Heat the heat-shrink sleeves into the headphone wire. Apply enough heat to tighten it. The heat-shrink sleeve will insulate and protect your newly repaired headphone wire.
2. Repair without soldering
You don’t have to be a master at soldering! There are simpler ways to fix broken headphones wires.
Need:
- Wire stripper (or cutter)
- Lighter (or sandpaper)
- Heat-shrink tubing
- Scissors
The rubber sheath or covering should be removed
To expose the stripped wires, use a wire cutter or wire stripper. You must be careful not to break the wire.
Sort the wires according to their color
You can separate the colored wires (right and left headphones cable = red wires; blue/green wires respectively) by twisting the wires together and moving them to one side. Do the same with the two ground wires (copper and gold wires). Do the same with the other end of the cable. This youtube video will demonstrate how it is done.
The enamel coating can be melted off
Use a lighter to melt the enamel coating (colored varnish covering wires). Sandpaper is also an option. Do the same for the other end of the cable.
This should be done quickly, not taking more than a second. Varnish burns easily and can melt if it is overheated. Blot the varnish quickly when it reaches a thickness of 1 to 1.5 cm.
Separate the wires
By twisting the wires together, you can splice the colored wires.
It should be wrapped.
Read More: How To Fix Headphone Jack Without Soldering?
Why Self-repair Matters On An Individual And Global Scale
Being a DIYer entails more than just having an overflowing Pinterest board. It increases customer efficacy while benefiting the environment. As we know from cellphones and computers, our treasured electronics sometimes come with an expiry date. This is referred regarded as deliberate obsolescence. This goes beyond smartphones since cables are often the first component to break on headphones and earbuds.
Self-repair is an excellent skill for anybody who does not want to spend large amounts of money every time their headphone wires break. It improves your grasp of how technology works, but it also saves you money.
Furthermore, producing headphones is not inexpensive. They have a significant impact on the environment and ecosystems. Many of us, including me, chuck them in the garbage when they break. The waste is subsequently transported from the ends of our driveways to landfills by waste management. Often, this trash is sent to a developing nation, where it leaches caustic, hazardous compounds into the soil and water.
Our rubbish instantly impacts the local population’s health by being exported to nations that are too impoverished to reject it. Outsourcing is just a means of sweeping the issue under the rug.
If garbage isn’t resting in bodies of water, it’s burnt. When a person is overexposed to dioxins, the World Health Organization (WHO) states that they are very hazardous and may cause developmental difficulties, cancer, and immune system damage.
It also has a socioeconomic influence on the surrounding area. Countries must find out how to deal with the imported rubbish. In certain circumstances, however, this dumping is done illegally. After a protracted legal battle, the Philippines returned to Canada 1.5 tonnes of illegal rubbish mislabeled as recyclable plastic in 2013 and 2014.
Sure, a single headset cable repair isn’t going to transform the world, but macro change starts at the micro-level. When you repair your wires, you are not left stranded and helpless when anything breaks. We can spread our understanding of more costly, ecologically hazardous items like smartphone repair if we all undertake at-home cable repairs.
However, the immediate benefit is that it saves you money and eliminates the need to interact with an automated customer care person, which is the true nightmare of product failure.
How to Repair Broken Wires in Wireless Headphones
Wireless headphones do not have cords that can be cut or damaged. However, they can still malfunction and cause audio output to only one side. Once you have identified the problem, the wireless headphones can be repaired using the following methods.
You can fix your Bluetooth headphone’s internal wires if they are damaged or broken.
Carefully open the inner component case of your wireless headphones using a wire cutter. You can also use a flat-head screwdriver. You should ensure that the power is off.
- Locate the problem wire and use a soldering iron.
- To make sure the device works, put the casing back on.
- Reset a wireless headset wiring repair
Most problems can be solved by a factory reset, including issues with audio output. The steps required to reset wireless headphones will vary depending on the model and brand of the product. To properly reset your device, refer to the manual included with it.
Reset your wireless headphones and then pair the device with your phone to verify that the problem is solved.
Related Posts:
- How To Make A Headphone Stand? Top Full Guide 2023
- How To Make Your Headphone Louder? Top Full Guide 2023
Watch more:
FAQ
How do you fix headphone wires without soldering?
How to Repair Headphones Without Solder
Step 1: Disconnect the AUX cord.
Step 2: Take the rubber sheath off.
Step 3: Remove the varnish.
Step 4: Disconnect the headphone cable.
Step 5: Twist the wires together.
Step 6: Disconnect the cables.
Can you glue instead of solder?
There is no replacement for soldering. No adhesive can carry electricity or hold as well as solder.
Is Super glue safe for wires?
Superglue (cyanoacrylate glue) works well as an insulator. I’ve heard of folks using it to provide more grip to wire wrap boards. However, it is not performing the function of solder, nor is it making an electrical connection, but instead just preventing it from being unraveled. Insulation is provided by plastic tape.
Conclusion
Not everyone knows how to handle their device, and some will take it to the store, and replace it with a new one. Hooke Audio believes you already know how to fix headphones wire when there is a problem. Comment and share this article for everyone to know.

